How should I measure a window?
Replacement: Confirm the rough opening s at least ¼” ( W) x ½” (H) larger than the overall exact size of the window.
New Construction: Confirm that the rough opening is at least ½” (W) x ½” (H) larger than the overall exact size of the window.


How should I replace a window?
Replacement: Clean the opening of any debris. Remove pulleys, jamb liners, weather-stripping, and old screen hook eyes, other protruding screws, or fasteners.
New Construction: Install 6” asphalted building paper around the edge of the window opening.
Installation For Replacement Windows
- Place the head expander on the window.
- Install the sill angle behind the blind stop.
- Set window into opening and check for proper fit, then remove the window.
- Caulk inside of blind stops (head & jambs); also caulk where the sill meets stool.
- Place window in the opening and set firmly against blind stops.
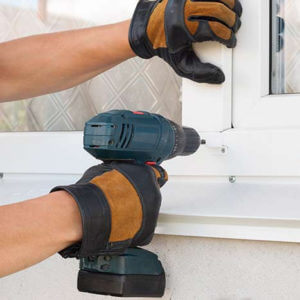
- While holding the window tightly against blind stops, install installation screws in pre-drilled holes at the top of each jamb.
- Don’t tighten if, at this time, you can fill the cavity between the window and wood with insulation.
- Plumb and level the window. Raise the lower sash several inches and check that there is equal space between the sash and sill all the way across. Shim where necessary.
- Make sure that there is equal space on both sides, be careful not to bow out jamb.
- Install two lower screws.
- Check unit for proper operation (up & down, tilt-in, lock, and screen movement): adjustments may be made by turning installation screws.
- Once a unit operates properly, all screws should be drawn up.
- Raise head expander up, screw into place.
- Caulk inside of the window, top, and sides where the window meets wood.
- Replace all interior trim.
Note: for proper installation and operation, All Seasons recommends a minimum of a 4-inch nominal wall thickness.
Opening:
The opening should be plum, level, and square and ½ inch larger than the window in height and weight. This does not include the nailing fin. Keep the window in the “locking position” during installation to prevent sash movement.
Apply 1/2 inch of quality grade silicone caulking to the interior side of the nailing fin, sealing the fin to the house exterior wrap.
Setting the window
Make sure the window sill is supported with straight and level position shims all around the bottom sill. Adjust shims to be equal on both sides. Hammer one upper corner to keep the window in place. This allows you to check the shims and level the window properly. Shims should be smug along the entire window and the window should be completely leveled. When completed and done properly all meeting rail should align and latches should lock smoothly.
Finally, using one-inch stainless steel nails secure the entire window. Using all of the slotted holes on the nailing fin. Used appropriate self-adhesive flashing all around the unit. Begin with the head and continue all around making sure flashing overlap each other. Install batt insulation between the window and opening. Careful not to overstuff or use other material such as expanding form for this may cause the window to warp.


How should I install a window?
Replacement: From the inside of the building, place the new window into the caulked opening tightly against the stool and use shims to block the window into the opening.
New Construction: From the outside of the building, place the new window into the opening tight against the nailing fin. If the window opening is not square, square the window in the opening.
Set The Shims: Place the shims under the sill at each corner, under each mullion at the location of each installation screw on the bottom and the top of the side jamb. A minimum of 3 pieces of shim should be placed under each sill.
Adjustment: Adjust the shims and the side jamb adjustor so the window is straight, level and plumb, and squared. The difference between the two diagonal lines should be less than the ¼” or used the sash to visually check the square.


How should I secure a window?
Replacement: Use installation screws to securely fasten the window. Be sure all sashes can be operated smoothly during the securing process. Install the interior stop and casing. Install coil trim as needed on exposed exterior wood. Apply caulking ( approximately ¼” thickness) evenly to where the window meets the wall and blind stop. Seal all gaps both inside and outside with nominal 3/8” diameter sealant.
New Construction: Use framing nails and nailing fin to securely fasten the window ( for a window with a “J” channel is a pneumatic/electric nailing gun to prevent damage). Back caulking the nail fin and use window tape over it. Be sure all sashes can be operated smoothly during the securing process. Install the interior stop and casing. Install coil trim as needed on exposed exterior wood. Apply caulking ( approximately ¼” thickness) evenly to where the window meets the wall and blind stop. Seal all gaps inside and outside with nominal 3/8” diameter sealant.


Measuring a Home’s Humidity Level
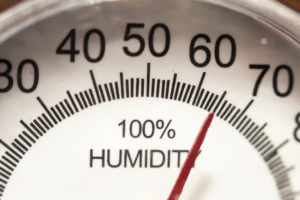
You can determine how much moisture is in your home with an inexpensive Hygrometer that can be purchased from your local hardware store.
Place the Hygrometer in your home for a few days and record the readings each day. Compare your data to the chart below.
As outside temperatures drop, the indoor relative humidity level of your home should decrease. For homes with windows equipped with insulating glass, the University of Minnesota Agriculture Extension Service reports that the following humidity levels can be maintained in the home without causing window condensation.
Outside Air Temperature
Inside relative humidity for 70º F (21º C) indoor air temperature
- -20ºF -29ºC 15% to 20% humidity
- -10ºF -23ºC 20% to 25% humidity
- 0ºF -18ºC 25% to 30% humidity
- +10ºF -12ºC 30% to 35% humidity
- +20ºF -7ºC 35% to 40% humidity
If your home’s relative humidity is higher than this chart, see below for tips on identifying and eliminating sources of excess moisture in your home.
If you are experiencing condensation on your Integrity windows or doors, and your relative humidity is within the ranges shown on the table above, please contact a Marvin retailer near you and request that a service representative visit your home to assess the problem. Please keep your recorded humidity data handy, as this is important information needed by the service representative.


What is condensation?
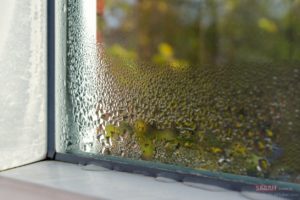
Condensation on the outside of your window is a result of moisture in the air exceeding certain limits and the temperature of the glass falling below the dew point in the air. The outside surface may be quite a few degrees cooler than the inside surface. The glass temperature may be lower than the adjacent air temperature.
Condensation of the interior glass is a result of moisture in the air of a structure exceeding certain limits and showing upon relatively cool glass surfaces. Windows are the coolest areas of exterior walls, even though they may have thermal panels, be glazed with sealed insulating glass or Low-E. When the warm room air comes in contact with the glass surface, it is cooled, and if there is enough moisture in the air, the dew point will be reached and the water condensed out. Those situations mentioned above are an all-natural phenomenon.
Condensation is the result of excess humidity in your home. Some ventilation techniques can be used to reduce indoor humidity. For example, opening windows to air out a home; running fans more frequently. Condensation of the interior glass is a result of moisture in the air of a structure exceeding certain limits
Seal failures occur when the seals along the outer perimeter of glass fail and allow moisture to penetrate the space between the panes of glass. Moist air can fill the space and the inside of the insulated unit will appear fogged. All Season’s 10-year limited warranty provides coverage for the replacement of failed insulating glass units. To provide you with the most efficient solution, we ask that you please contact your local All Seasons dealers or contractors. Explain or describe the problem to them, and they can arrange for an inspection to determine responsibility and order any replacement insulated glass units that may be needed.
During cold winters, there is a great temperature difference between the inside of a house and the weather outside. When the temperature drops outdoors, the glass on your windows and doors tends to have lower temperatures than other surfaces in your house and is the first place that you’ll notice condensation in your home. This is not due to any defect in your window or door; it’s simply a sign of high humidity in your home.
Warmer air is capable of holding much more moisture than cooler air. The temperature for vapor-filled air goes down when it gets close to cooler surfaces, and so does its ability to hold moisture. When the temperature reaches its dew point, the moisture condenses, attaching to the nearest cool surface. The first surfaces where you’ll notice this happening is the glass on windows and doors.
Condensation is an unsightly problem. But the problem goes deeper than that: If condensation is a chronic occurrence in your home; chances are that you have excessive humidity. If water is accumulating on glass, chances are it is accumulating on other, harder to see surfaces such as wall and roof cavities. If left uncontrolled, excess moisture can have serious consequences, including:
- Mold or mildew
- Wood rot and warping
- Roof ice build-up
- Damp, ineffective insulation
- Discolored, blistered or bubbling paint
- Damaging moisture inside walls and attic
Excessive humidity is more likely to occur in newer or recently remodeled homes with a tight, energy-efficient construction, causing a buildup of moisture to the interior. There are ways you can reduce humidity in your home. See “Measuring a Homes Humidity Level” and “Excess Moisture: Causes and Cures” below for tips on identifying and eliminating sources of excess moisture in your home.


Excess Moisture: Causes and Cures
Cause: Inefficient windows with extremely cold glass surfaces
Cure: Install energy-efficient windows and doors. High-performance windows, such as those made with Low E II coatings with Argon gas, make the most of the sun’s heating rays during cold months and maintain a remarkable temperature difference between the indoor and outdoor panes of glass.
Cause: Inadequate ventilation of windows
Cure: Keep window coverings open during the day to allow air circulation and make sure patio doors have heat vents beneath them.
Cause: Moist air trapped in attic
Cure: Seal around indoor light fixtures to prevent warm, moist air from rising to the attic. Install soffit vents to prevent attic rot, making sure to keep vents clear of dirt and garden debris.
Cause: Radiator or kerosene heat
Cure: Use dryer sources of heat such as gas or electric furnaces.
Cause: Cooking and dishwashing
Cure: Vent stove range hoods and dishwashers to the outside. Cover pots while cooking.
Cause: Stale, damp air
Cure: Install an air-to-air heat exchanger to vent moist air outside. Some air quality systems recover up to 97% of the existing warmth and energy to heat incoming fresh air.
Cause: Showers and baths
Cure: Make sure bathroom exhaust fans are vented to the outside and use fans regularly.
Cause: Ironing, washing and drying laundry
Cure: Make sure the clothes dryer is vented to the outside and/or install an exhaust fan in the laundry room.
Cause: Dirt floor crawl spaces
Cure: Vent crawl space and/or cover the dirt with plastic to create a vapor barrier that will prevent moisture in the soil from rising into the home.
Cause: Groundwater seeping through foundation
Cure: Install gutters, flashing and downspouts, and grade dirt to channel water away from the home’s foundation. (Minimum 6″ slope over a 5′ run.)
Cause: Indoor plants
Cure: Use small fans to circulate air.
Cause: Excessive humidifier use
Cure: Keep indoor air quality to optimum humidity levels. Hygrometers are available at most hardware stores and can be used to measure home humidity levels.
Cause: Damp basement allows ground moisture into home
Cure: Running a dehumidifier in the basement can reduce musty odors and mold.
Cause: Unseasoned firewood
Cure: Minimize indoor firewood storage.
Cause: New wood, plaster, cement, and other building materials
Cure: Building materials contain a great deal of moisture. As soon as the heat in the home is turned on, this moisture will flow into the air and settle on windows and other cool surfaces. Plan for extra ventilation for the first few years in a new home or newly remodeled home.
If you have an existing moisture or condensation problem, do not count on correcting it merely by installing new windows. An insulated window should help relieve the situation. You must remember: Windows do not cause condensation. Therefore, windows cannot cure condensation.


What do R-values and U-values mean?
R-value is the measure of its resistance to the transfer of heat flow. An R-value depends on the number of layers of glass in a window, what type of gas is between those layers, and whether one or more of those layers of glazing have been treated with a Low-E coating.
U-value is the opposite of R-value. It is the measure of the window’s ability to conduct heat. It represents the amount of heat that escapes through a wall, window, roof, or another surface. The lower the U-value, the more energy efficient a material is.


What does Low-E glass stand for?
The low-E special pyrolytic coating helps increase the efficiency of your windows year-round. In the winter, Low-E insulating glass units literally reflect heat back into the room, clocking as much as 71% of the heat that can escape through the conventional glass. In the summer, Low-E stops as much as 65% of re-radiated solar heat from entering your home, while the special coating reduces direct summer sun rays by as much as 13%.


What is Energy Star? What does it have to do with windows and doors?
Energy Star is a U.S. government program, administered by the Department of Energy and the Environmental Protection Agency with the cooperation of manufacturers. That is designed to reduce the consumption of fossil fuels through the education of customers. Windows and doors can only carry the Energy Star label if they are tested by an independent laboratory through the NFRC program and meet specific, predetermined U-value rating. By selecting Energy Star products, you will reduce your energy costs and help make the environment clean.
You can find more information about the Energy Star guidelines at http://www.energystar.gov


What should I know about NFRC?
NFRC stands for the National Fenestration Rating Council. It is a program established by the U.S. Department of Energy to help consumers compare window products and options. Window manufacturers participating in the program are required to label every window to its specific thermal performance level. All Seasons is a participant in the NFRC program.
You can find more information about the NFRC at http://www.nfrc.org


Does Argon Gas increase energy efficiency?
For air to insulate well, it needs to be as still as possible because moving air carries energy. Argon gas is heavier than air so it is less prone to convection or thermal movement. It offers a higher level of insulation.


What are Egress Windows?
Egress windows must have an opening of 5.7 square feet. Regulations vary, so check with your town’s building planning board to obtain regulations.


What are the benefits of vinyl windows over windows made with wood, aluminum, or a combination of materials?
Vinyl is the ideal window construction material because vinyl does not damage or corrode when scratched. The color of the vinyl is molded clear through, and will never pit, peel, chalk, or require any maintenance other than normal cleaning. Besides, it can be fusion welded to eliminate air and moisture leaks at the joints.
